EVE-NG Installation on VirtualBox

A conversation in Birmingham:  A story based on true events

Once upon a time in a cloudy and chilly winter day in Birmingham, a conversation between hemo and Mr. X took a place. A conversation about network emulators and how important they are.

Act 1: The conversation

Mr. X: There are multiple network emulators that can be run on Type 2 hypervisors like GNS3 that runs on VMware Workstation and VirtualBox and EVE-NG that execlusively run on VMware Workstation .

Hemo: I think you are wrong regarding the inability of running EVE-NG on Oracle VirtualBox.

Mr. X: I have tried to run EVE-NG on VirtualBox multiple times before. Unfortunatly, It keeps crashing on boot. I even tried installing it from the ISO file. It kept crashing!

Hemo: The emulator can be run on VirtualBox, but it requires certain tweaking to run properly. The reason behind that is that it requires nested virtualization which was not supported by VirtualBox until recently and it is disabled by default.

Mr. X: This is wonderful! I always thought it is not possible to run it on VirtualBox. So, how do I run it on VirtualBox?

The light turned off ending the first act.

Act 2: The guideline

Requirements

Running EVE-NG on VirtualBox requires certain requirements. First, CPU virtualisation support needs to be enabled on the BIOS. Second, the latest version of VirtualBox is installed. Lastly, there are certain specification needs to the host machine to have like the host has at least 4 GB memory, 40 GB of free storage space and a fairly good performance like AMD Ryzen 5 or Intel Core i5 processors or higher.

Downloading EVE-NG and its companion component

EVE-NG comes in two flavours; paid and free. However, In this post we will stick with the free edition a.k.a the communicaty edition. Yet, the instructions can be the similar if not identical for both versions. To download EVE-NG go to EVE-NG official website.

In the home page go to downloads. The home page looks like the image below.
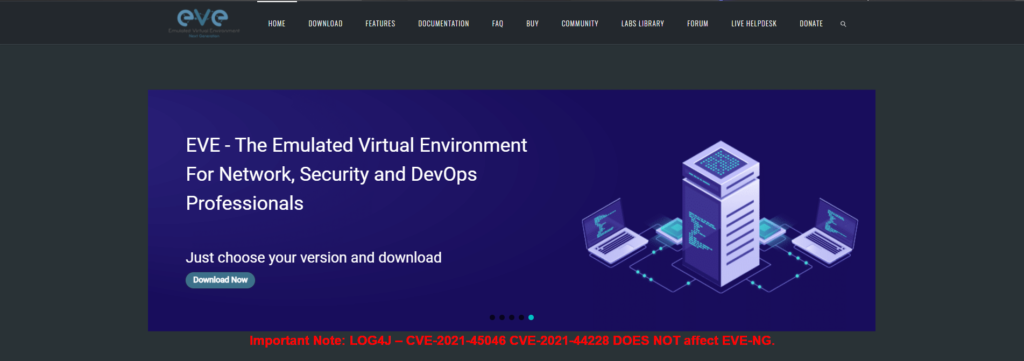
A screenshot of the home page of EVE-NG
Home page of EVE-NG.

In the download page, select the OVF version of the community edition. EVE-NG provides two methods to download the emulator; MEGA link and Google Drive link. Select one of these links.

Integration pack is a companion component that works along with EVE-NG birnaries. The companion components consists of different tools like putty and wireshark wrapper and it aims to improve user experience. Integration pack supports Windows and Mac OSX (Intel / M1 processor). To download to the companion scroll down and click on integration pack that matches the platform you are using. The image below shows the link to download the pack for Microsoft Window platform.
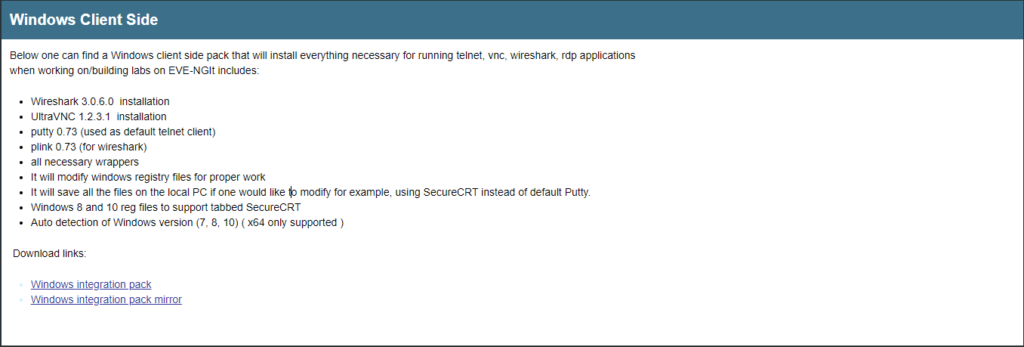
A screenshot of EVE-NG for Microsoft Windows Operating Systems.
EVE-NG for Microsoft Windows Operating Systems.

Once the OVF is downloaded, extract the compressed file and keep it in a known location.

Importing OVF

The second step after downloading and extracting the required files is importing OVF into VirtualBox. Open VirtualBox and click on File ->Import Appliance from top menu as in the figure below.
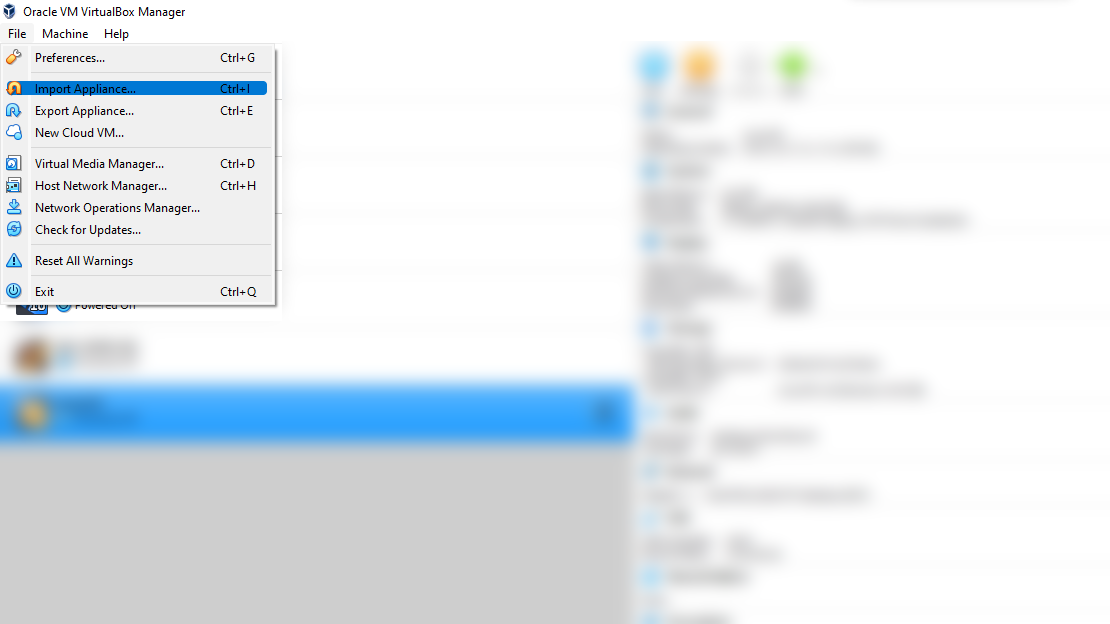
The image is a screenshot from VirtualBox to show how to start importing EVE-NG OVF files.
Screenshot from VirtualBox

Navigate to the prevoiusly extracted EVE-NG compressed file, select and OVF files and click Next.
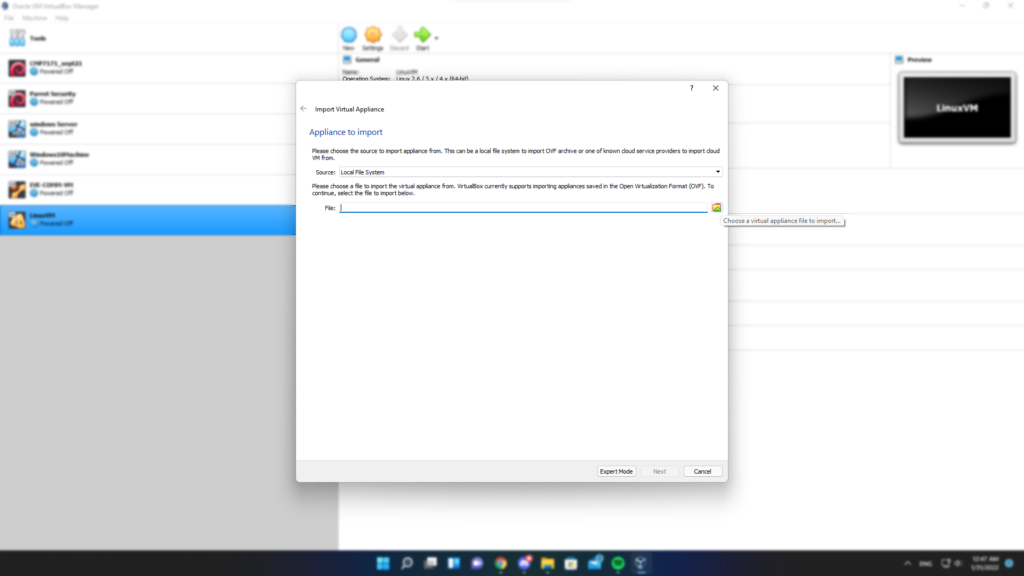
A window that promots the users to the location of the appliance.
Select Import path window

In the next window keep setting at default and click Import

Configuring the EVE-NG for VirtualBox

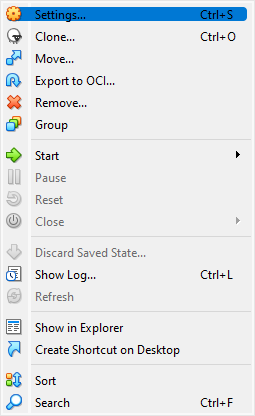
The next step is configuring the appliance for VirtualBox. Right click the recently imported appliance and click Settings.
Next, Click on System and then click on Processor. You will notice that Enable Nested VT-x/AMD-V is not enabled. As a result, EVE-NG is failing to boot. To mitigate this issue, tick the box as in the image below and click OK. Not enabling Nested virtualisation is the main cause of EVE-NG failing to boot.
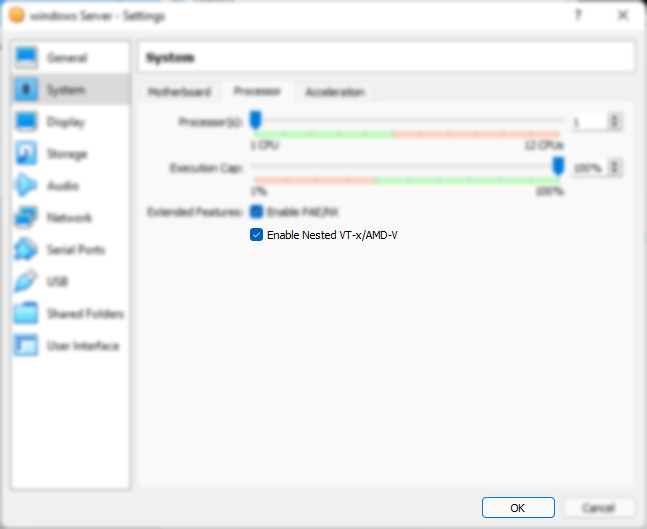
This is a screenshot for EVE-NG virtual processor window. Most of screenshot is blurred other than certain option and OK Button.
VM Setting page

Go back to VirtualBox and click on Turn On EVE-NG virtual machine. Once the VM is turned on check VM console window. The VM console window displays the IP address that is assinged to the virtual machine.

Accessing EVE-NG
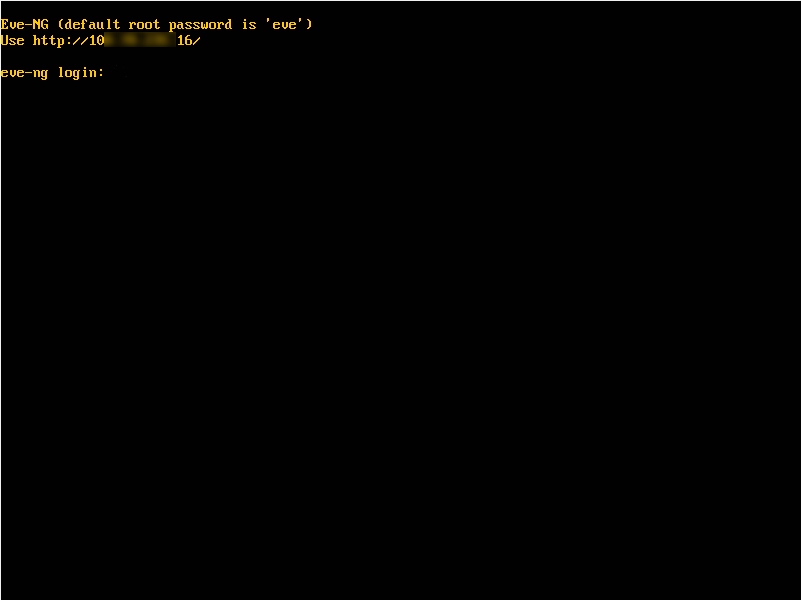
This image is a screenshot from EVE-NG VM aftering turing the VM on. In the console the IP address assigned to the VM is shown but blurred for privacy reasons.
EVE-NG Console page showing IP (Blurred)

Finally, open a browser and type the same IP address displayed in EVE-NG console page. The browser should display a similar output to the image below.
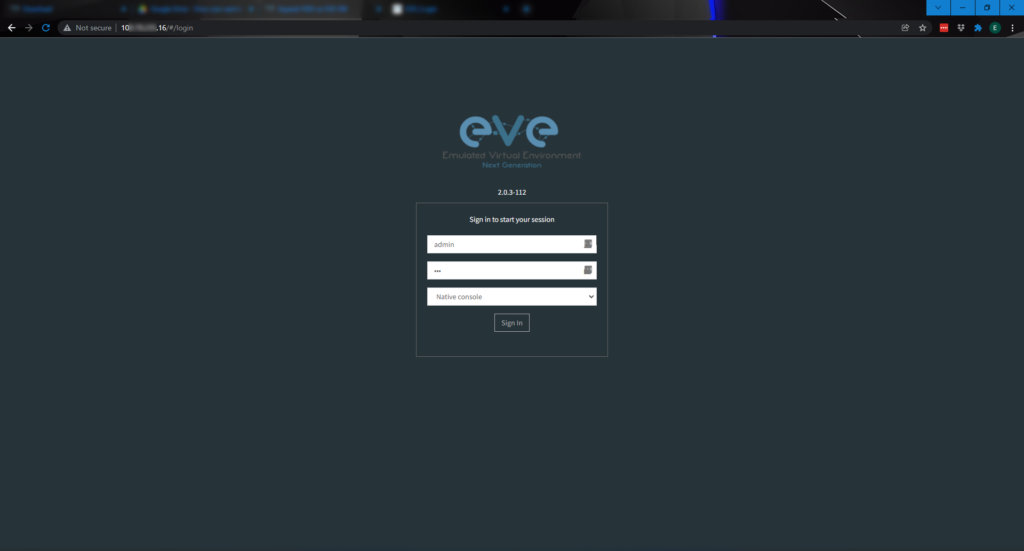
EVE-NG home page

Companion pack installation

Finally, After successfully running the emulator we shift gears and install the companion pack. It starts by double clicking on downloaded file. Then, keep all setting on default and keep click on Next until the end of the wizard.

OpenSSL on Windows

It was a lovely Tuesday at the office after sipping some Earl Grey Hemo received a phone call from the his manager.

Manager: Hey Hemo. I have a task for you for today. We have renewed our wildcard certificate and I need to you generate a certificate a new Certificate that requires a private key as well.

Hemo: Alright Mr. Manager. Let me see what I can do.

Manager: Before you proceed I have a small challege for you. I want you to perform this task using OpenSSL on a Windows environment.

Hemo: Challenge Accepted.

The phone call ended with the words “Challenge Accepted”. The challenge in this task is OpenSSL does not release any binaries for Windows. System administrators have to compile their own copy of OpenSSL to use it on Windows. This is somewhat hectic for windows administrator. Thus, we will cover how to generate and private key and a CSR to be used with CA to generate a public key. So, to perform this task we need the following:

…CSR?! …Private Key?! …Public Key?!

One of the requirements to have a secure connection between two devices is to use symmetric encryption. Asymmetric encryption is used by TLS to secure web traffic. Asymmetric encryption is based on Key theory. The key theory says to encrypt any traffic you have to have two keys. A public key that is shared with everyone and is used to encrypt the content. On the other side, there is a private key that MUST NOT be shared with anyone and is used to decrypt content that was encrypted with the public key. The image below demonstrates the process.

Symmetric Cryptography demonstration
Cortesy of SSL2buy

CSR stands for Certificate Signing Request and it is a request to ask “a Key maker” to make a public key that works with everyone. The technical name for the key maker is Certificate Authority known as CA for short. There are well known Certificate Authority like Let’s Encrypt and Digicert.

Let’s do this

Installing Git for Windows

One of the issues with using OpenSSL on Windows environments that it does not release any official binaries for windows. There are some unofficial builds but they are unofficial builds and could be insecure. However, Git for windows comes with a precompiled copy of OpenSSL that is usually up to date. The use of a new version can help to prevent security vulnerabilities like Heartbleed.

First, we need to download Git for Windows from the link here. Then the appropriate version for your Device. As a rule of thumb, always select 64-bit for Windows Setup as most devices support this version if you are not sure which version to pick.

Image of the of download links

We are interested in getting OpenSSL more than configuring Git. Thus, we keep the setting on defaults for most parts.

In some cases you might get the below windows. Click on Run to Proceed.

Image of Smartscreen

Read if the EULA is you want and then click on Next > (I don’t read them)

EULA page

Select the path you want to install Git for Windows. keep in mind this path as we will need it later. We will keep it on default and press Next >. Please note if the account is not an administrator account. The default installation path will be under C:\Users\

Default Path Page

In this step, we select components to install. The default options contain OpenSSL. Thus, click on Next > and proceed to the next step.

Component Selection

Keep the defaults and click on Next > and proceed.

Installation Name

In this this we choose the associated editor with Git for Windows. You can change it from the default to your proffered editor. Then, click on Next > and proceed.

Default FIle Editor Selection Page

Nothing to change here. Proceed by clicking Next >

Initial Branch selection Page

Keep the rest of the setting on default until you reach the window in the below image. Start installation by clicking on Cancel…. Just kidding. Click on Install to start the installation.

Enabling Expermental support

By doing this we have finished git for Windows installation.

Running OpenSSL

To use OpenSSL you need to open Command Prompt and run it as Administrator. If the command prompt in administrator mode is successfully started. The below output as in the below image is visible.

Command Prompt in Admin mode

Then in the command we switch from command prompt default path to “C:\Program Files\Git\usr\bin” using the below command.

" CD C:\Program Files\Git\usr\bin"

Then we have run openssl.exe to be able to generate our CSR. To the openssl.exe we use the below command.

openssl.exe

Private Key Generation

After executing openssl.exe the first step to take is to generate a private key. To generate a private key run the following command.

genrsa -out yourdomain.key 2048

The generated will be under the same path of openssl.exe. If you kept the setting on default the path will be C:\ProgramFile\Git\usr\bin

If the command was successfully executed then you should get an output similar the image below.

Private Key execution window

The second step is generating the CSR. The CSR is generated using the following command

req -new -key supersecretwebsite.key -out supersecretwebsite.csr -subj "/C=BH/O=Hemotipstech/OU=IT/CN=supersecretwebsite.com"

CSR Generation

There are a few things that need to be changed when you run the command in your environment. First, supersecretwebsite.key should be replaced with the private key you have generated in the previous step. Second, the CN which stands for Canonical Name should change into your domain. If your domain is mydomain.com then CN=supersecretwebsite.com should be replaced with CN=mydomain.com. If the command was run successfully, no output is expected. However, a file titled supersecretwebsite.csr will be generated in the OpenSSL directory.

Public Key generation

Unfortunately, this step is different from a CA or another. Thus, it is not possible to discuss it here. You can find below step on generating public certificates using the following popular CAs:

Hemo’s Take

There are multiple ways to generate certificates and what is shown here is just one way to do it. Thus, don’t be afraid If you have found another method or were told to use another method. In the end, remember to use HTTPS with a valid certificate over HTTP all the time.

One more point, this tutorial is inspired by a tutorial published by digicert for linux. It was modified to for use on Windows enviromments. The original tutorial can be found here.

Home lab upgrade – Routers

In the last few days, I upgraded the network setup of my home lab. I have replaced two over a decade old CISCO 2610 routers with a newer router. The previous routers were replaced not for their old age; Until they were decommisioned they were working flawlessly. They were decommissioned due to their limitation. Before the upgrade the setup looks like the following:

 Home Lab Network Infrastructure Before the upgrade
Home Lab Network Infrastructure before the upgrade

As seen in the image above, the connection between the 2610 routers is a serial cable. Serial cable limits the connection speed up to 8 Mbps. Moreover, the connection was not stable at all. As a result, connecting VMs to the Internet is barely possible.

New routers requirements

For a basic infrastructure for my home lab, I do not have niche requirements. Thus, my requirements were dual gigabit ports, not too old and there is room for future ios updates and lastly, it is affordable. I chose CISCO1921-SEC/K9 to replace the current 2610 routers I use. CISCO1921-SEC/K9 is a dual gigabit connection and it is supported by Cisco until 2020. Moreover, it has some security features like VPN connectivity, firewall IOS, and others as well.

Buying the new router

I live in Bahrain and Bahrain does not have a market for used enterprise equipment. As a result, I needed to get my router from outside of Bahrain as I did with my servers. For this purchase, I decided not to spend a lot. Thus, I had a limited budget. I tried buying from US and German-based websites that sell used and refurbished equipment. The shipping cost was too high for the price of the device. Then, I looked into other options like eBay and surprisingly Amazon. I ended up buying my router from Amazon. I bought one router instead of two. The reason is that I do not think about building a two sites architecture for the time being. I paid about $142 (About 43 BD) including shipping!!

Buying a single router will change how devices are connected to each other. The new arrangement will eliminate the need for using dynamic routes (OSPF, EIGRP..) because all networks are handled by a single router. The below image shows how devices are not connected in the home lab.

 Home Lab Network Infrastructure Afterthe upgrade
Home Lab Network Infrastructure After the upgrade

Future Plans

Buying the new router allows me to connect my home lab to the Internet properly (Finally). Moreover, the new setup allows me to deploy services like WSUS and others in my current home lab. Which means more ideas for future blog posts. Also, it allows me to experiment with some of CISCO related security features like VPN and others.

VMDK split files merging: The hard way

The previous versions of vSphere supported deploying virtual machines from an OVF template with split VMDK files. However, starting 6.5 VMware removed support for chunked VMDK files. As a result, vSphere 6.5 may not deploy old templates. VMware fixed this issue by releasing a tool that combines VMDK files automatically. Multiple blogs covered this tool like in this post. In this blog post, the same procedure will be covered without VMware tool on Windows and Linux.

Get your Hand Dirty on Linux

1- Combine the chunks

Linux

The process on Linux is simple and it consists of two basic steps. First, combine all VMDK chunks into a single file. To do so, keep all chunks in a single folder and run the following command.

cat vmName-Disk1.vmdk.* > vmName-Disk1.vmdk

Windows

In windows, the step is slightly different. Instead of using cat command like in Linux, copy command with /b argument is used to combine files. Moreover, in the command add all chunks. For example, if disk 1 consists of three chunks. the command will be as following:

copy /b vmName-Disk1.vmdk.000000 + vmName-Disk1.vmdk.000001 + vmName-Disk1.vmdk.000002 > vmName-Disk1.vmdk

2- Edit the OVF file

In your favorite editor (Notepad, Nano, Vim…) open the OVF file. In OVF file you will see something like:

<File ovf:chunkSize="7516192768" ovf:href="vmName-disk1.vmdk" ovf:id="file1" ovf:size=... />

Remove the following part:

ovf:chunkSize="7516192768" 

Then you will get something like:

<File ovf:href="vmName-disk1.vmdk" ovf:id="file1" ovf:size=... />

Finally save the file and you are done. Moreover, remember net to select the metadata checksum file (.mf) is exists as it is no more needed in Vsphere 6.5 and beyond.

Hemo and buying a used server

A humor Image of a monkey looking at a computer screen.
Just a Random Image XD

Months ago I decided to finally build my personal home lab. I decided to build mine so I can develop my skills and become more familiar with breaking servers. As a result, I allocated some budget for the project that does not exceed 1000 BHD ( about $2600). My requirements are a server enclosure ( Server Rack) that is no more than 30U, a single U used server and few switches and routers for the first phase.

In this blog post I will cover my experience of getting a used server in Bahrain. In other countries the experience will be totally different.

Getting the rack

I tried to get a server rack as cheap as possible. I was looking for a used worn out rack for month but no luck. After that, I scouted most IT shops in the country for an affordable one. However, the cheapest one I found was for about 150 BHD ($380). A godsend friend who works for an IT vendor in the region used his networking to allow me to have a new rack for close to free.

The used server

Buying Locally

After securing a rack to store the equipment I started looking for used servers. I chose getting a  used one because I don’t need brand new server in the server lab. After some time I found a used server for about 1000 BHD, which is way above my budget. After giving up finding a used to for an affodable price in the kingdom, I looked for low end new server and I found one for an affordable price (Sort of).

Buying Online

Logo of servermonkey used server seller
Server Monkey logo


Before going to buy the weak server, I googled for companies that sells refurbished servers. I found a chunk of them, but I decided to go for ServerMonkey. ServerMonkey sells refurbished hardware that is pulled from working environment then they refurbish them to  give those hardware a second life. To my surprise server cost and shipping from The States to Bahrain is less than buying a refurbished one and the imported one is better and newer than the local one.

When I got my server the packaging was really good and saved the equipment for crashing with each other all the way from US to here. Installing the server in the rack went with no issues thanks to some videos on YouTube. Finally I connected my Server into my PDU.

Hemo’s Take

Unfortunately, there is not a single community that manages refurbishing used equipment in the country. Also retailer here should stop selling used equipment at a ridiculous prices. People who are buying these stuff are not business, but people building their home server labs. Be mercy on them.

Introduction to Linux

Picture of Linux mascot
Linux mascot “Tux”

As a tech worker, one of the skills that is a must is ability to use Linux. I won’t give you a walkthrough on how to write your first command or how to install it. However, I will talk about what do you need to know about Linux before using it. It is because Linux is not just an operating system. It is philosophy and an interesting story in a form of an operating system. 

What is Linux? 

Linux is an open source operating system created by Linus Torvalds for x86 architecture and then for other architectures. Linux is greatly seen and used in data centres due to its performance, stability and flexibility. 

Open Sauce ?!! 

No not open sauce but open source. In software development world there are two different philosophies. The first believes no one should ever see how a certain application is made and nothing of its source code is open to public. This philosophy is called closed source or proprietary code.  The other school believes that the source code must be open for public and they have the modify the code for their need, as long as they give credit to the original author. 

Linux History

In 1991 when Linus Torvalds was still as student he found out that there isn’t a free and open sourced operating system that available for the public. So, he decided to build a new operating system that free and opensource. 

Linux in depth… slightly

Over the years Linus is pretty much different than what it was in 1991. Also, due to availability of its code for the masses, there are many flavors of Linux. Each flavor is called a distribution. Each distribution differs from other by having different collection of application that are added to the system.  

Distributions are split into two families; RedHat and Debian. Each family has its own characteristics. RedHat is a commercial Distribution that is free but you have to pay for it for its support. RedHat is also known for its stability and production ready. However, its update cycle is usually slower than the Debian family. Debian family is entirely free and tend to update every 6 months. Moreover, it is equipped with the latest technologies and applications. 

Hemo’s Take

There isn’t the best distribution of Linux, because each distro has its benefits. As a result, you should choose the distro that matches your needs. Thus, I advise you to play with various distros until best fit is found and chosen.